Free Shipping on Orders Over $50

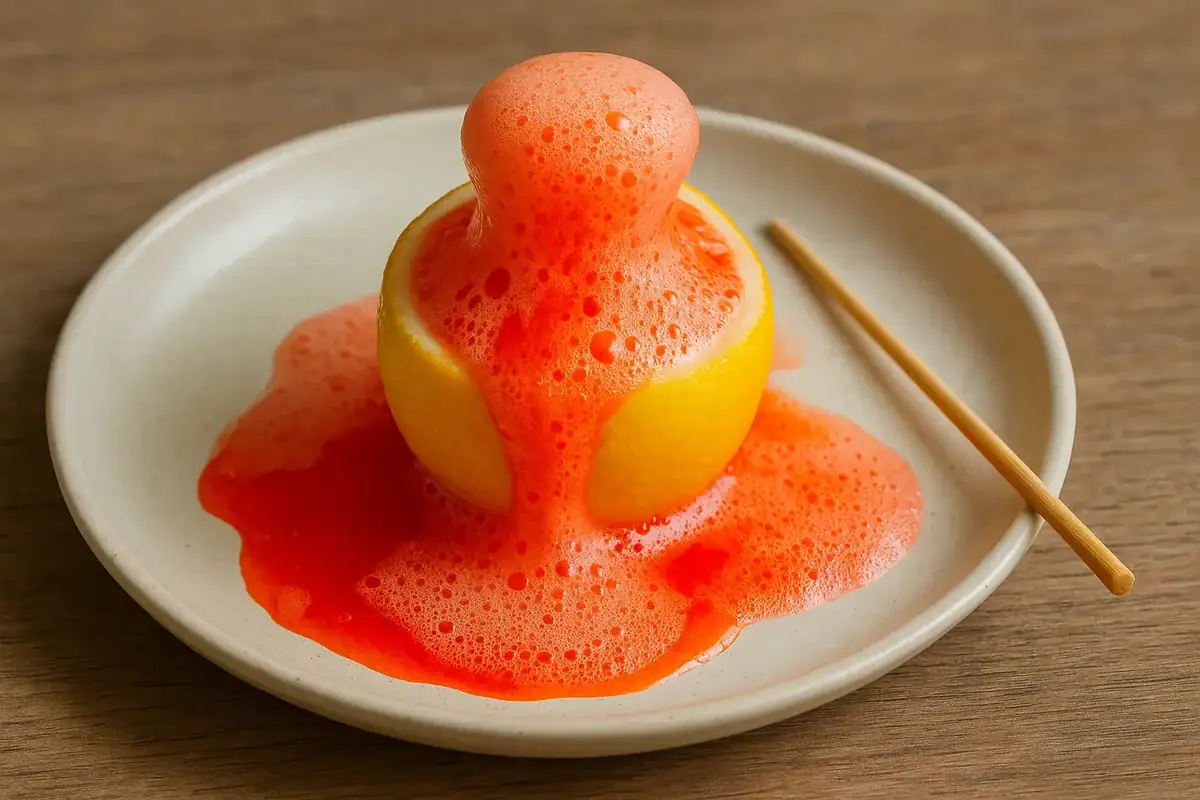
Discover a selection of ready-to-use scientific experiments that are easy to do at home or in the classroom. Each activity is presented with its objective, a list of materials, detailed steps, questions to stimulate thinking, a clear scientific explanation, and variations to go further. Some activities require adult supervision, especially when heat, products, or sharp objects are involved.
Contenus
afficher
1 Rainbow in a Bottle (Density Layers)
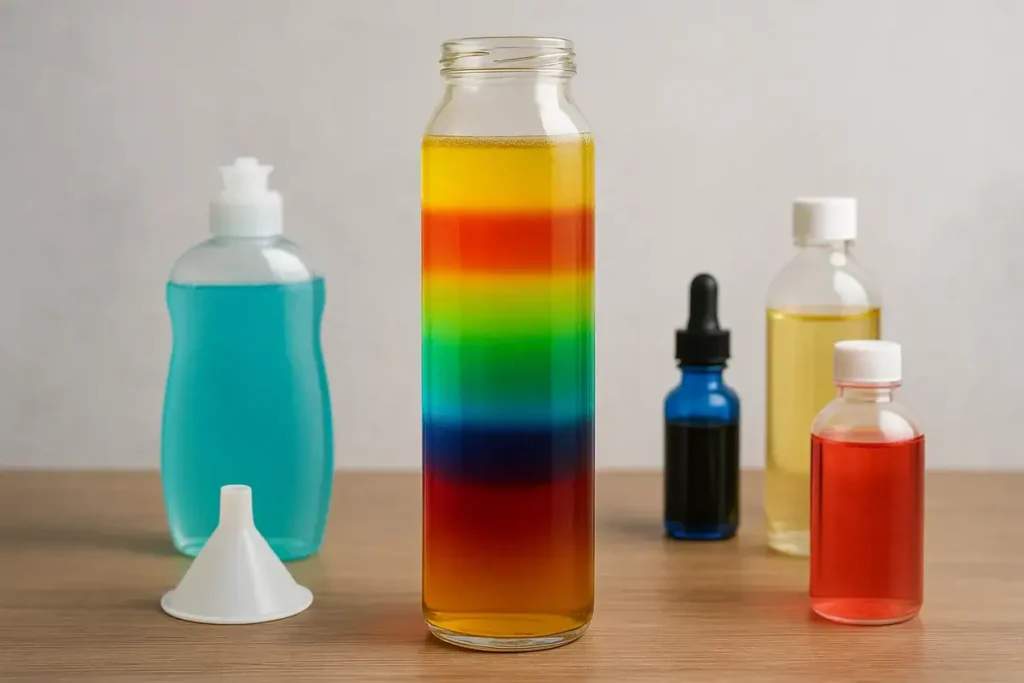
Nothing is more magical than a liquid rainbow forming before your eyes! This simple experiment allows children to understand the concept of density of liquids and why some float on top of others. With a bit of patience and precision, you can create a stunning multicolored bottle worthy of a miniature laboratory.
Materials needed:
- A bottle or a large clear glass
- A funnel (to pour without mixing)
- Honey (the densest layer)
- Colored dish soap
- Water mixed with a few drops of food coloring
- Vegetable oil
- Colored 70% alcohol
Steps to follow:
- Gently pour the honey at the bottom of the bottle.
- Carefully add the dish soap.
- Fill with the colored water, then the oil.
- Finish with the colored alcohol, which is very light and will float on the surface.
After a few seconds, the different layers stabilize and form a true miniature rainbow. The secret lies in density: the honey, being very heavy, stays at the bottom while the alcohol, which is very light, floats at the top.
Questions to ask the child:
- Why do you think the oil always floats on water?
- If we mix everything, do you think the layers will reform?
- What would happen if we dropped a marble into the bottle?
Fun variant: drop a small object (like a kernel of corn, bottle cap, or marble). It will stop in the layer that matches its own density. A simple and playful way to show that science is also colorful magic! 🌈
2 Water Journey by Capillarity
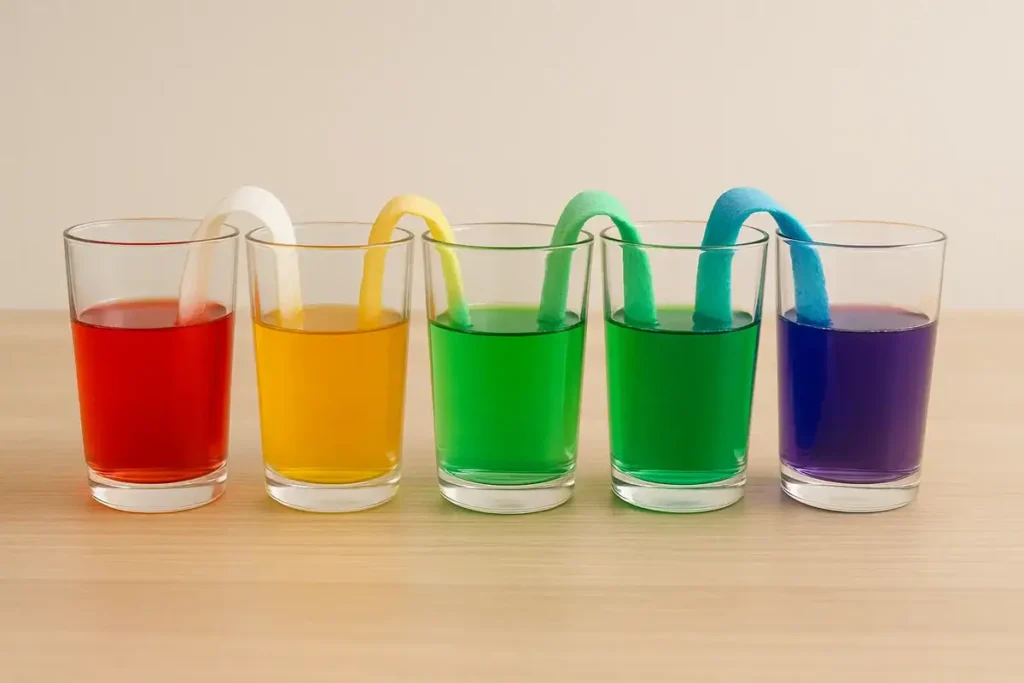
This experiment is perfect for showing that water can move on its own, like magic! It illustrates capillarity, the phenomenon that allows water to rise in plants and nourish their leaves. The result is as scientific as it is colorful: the glasses gradually fill up, and the colors mix before the children’s eyes.
Materials needed:
- 6 identical transparent glasses
- Clear water
- Red, yellow, and blue food coloring
- 3 folded paper towel strips (or thick absorbent paper)
Steps to follow:
- Fill the 1st, 3rd, and 5th glasses with colored water (red, yellow, and blue).
- Leave the 2nd, 4th, and 6th glasses empty at the start.
- Fold the paper towel strips and place them as a “bridge” between each neighboring glass.
- Observe and wait: the colored water rises in the paper and then descends into the empty glasses.
Gradually, the empty glasses fill up, and new colors appear (orange, green, purple) thanks to the mixing of the liquids. A fascinating show that keeps children captivated for several minutes!
Questions to ask the child:
- In your opinion, how does water manage to “climb” on its own?
- What new colors will form in the empty glasses?
- If we changed the order of the colors, would the result be different?
Explanation: The fibers of the paper towel absorb water by capillarity, like a sponge. The water rises, moves, and then falls back into the neighboring glass. In the end, the levels balance out, and the colors mix naturally.
Fun variant: Use wider or narrower paper towel strips to compare the speed of transfer, or place the glasses further apart and time how long it takes for the water to travel.
3 Soft Egg (Dissolved Shell)
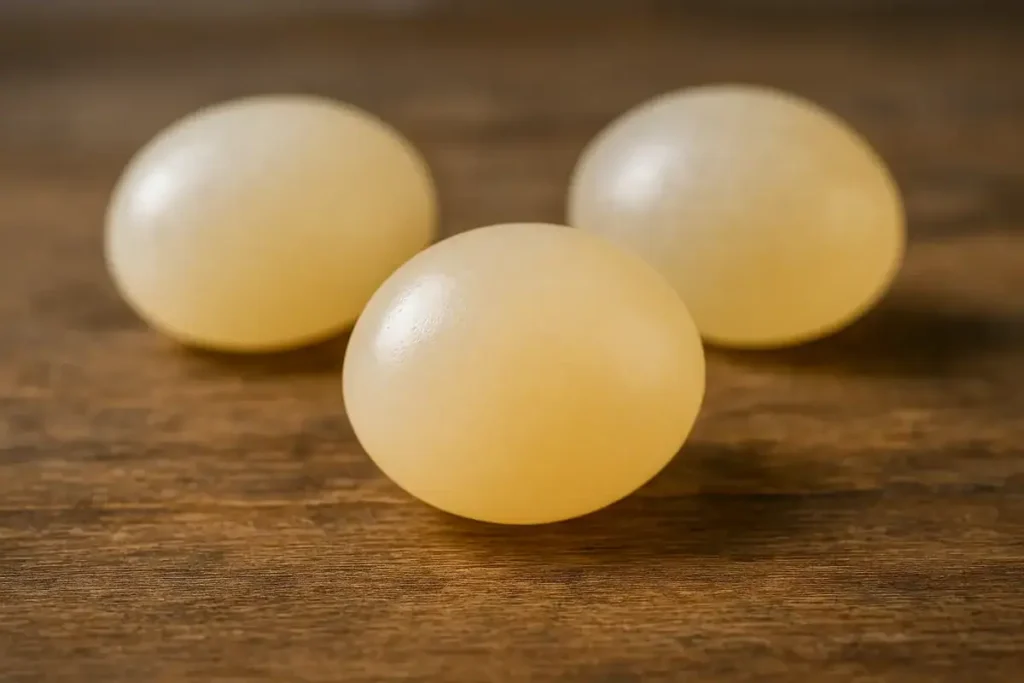
A simple raw egg can turn into a bouncy and translucent ball! This impressive experiment demonstrates the effect of a mild acid (vinegar) on the eggshell’s calcium carbonate. After a few days, the shell disappears, leaving only a soft and bouncy membrane. A true little miracle of home chemistry.
Materials Needed:
- 1 raw egg
- A glass or a jar
- White vinegar
Safety Precautions: Handle the egg gently and never ingest the liquid used.
Steps to Follow:
- Carefully place the raw egg in the jar.
- Completely cover it with white vinegar.
- Let it sit for 24 to 48 hours.
- Observe: bubbles form all around the shell.
- Gently rinse the egg: the shell has disappeared, and only an elastic membrane remains.
The egg then becomes slightly translucent and can even bounce gently on a soft surface. A spectacular effect that never fails to amaze children!
Questions to Ask the Child:
- Why do small bubbles appear around the egg?
- Did the egg change in size after the experiment?
- What would happen if we left the egg in the vinegar longer?
Explanation: Vinegar contains acetic acid which reacts with the calcium carbonate of the shell. This reaction releases carbon dioxide (the bubbles) and dissolves the shell. What remains is the membrane, soft and permeable: water passes through by osmosis, which can cause the egg to expand.
Fun Variation: Measure the circumference of the egg before and after to see the difference, or compare the reaction between cold vinegar and warm vinegar (always under adult supervision).
4 Miniature Iceberg and Salt
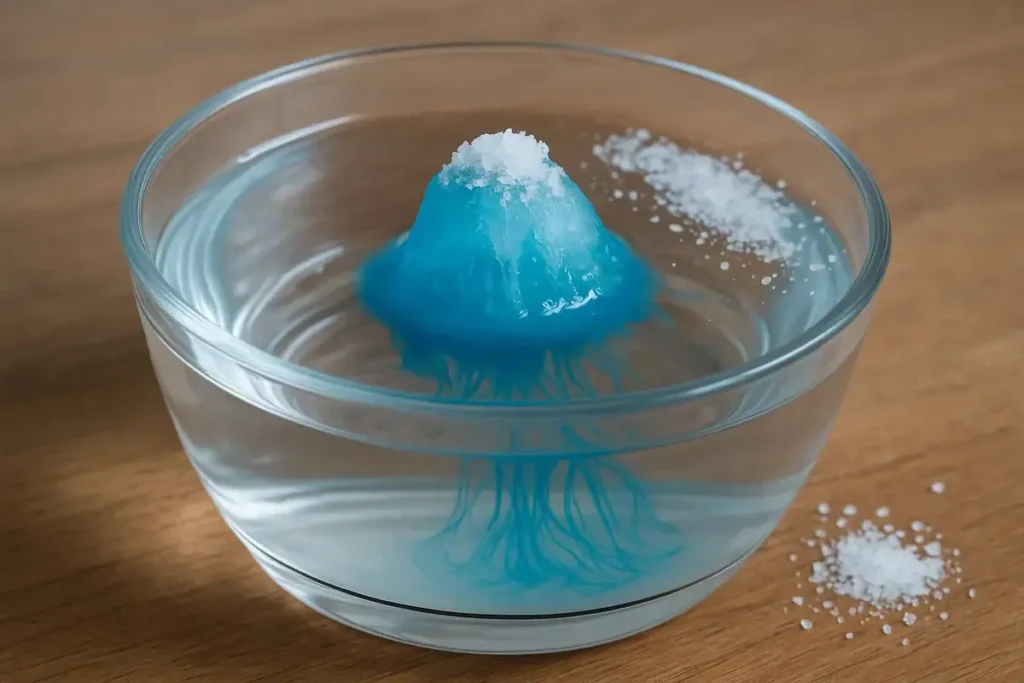
With this simple experiment, children discover why ice floats and how salt affects its melting. By observing a colored ice cube in a bowl of water, we recreate a true miniature iceberg and its amazing colored streams. A playful activity that encourages thinking about buoyancy and the role of salt in the melting of ice.
Materials needed:
- A bowl or a large glass filled with water
- Several ice cubes (preferably colored with food dye)
- Coarse salt
- A marker to trace the water level
Steps to follow:
- Gently place a colored ice cube in the water.
- Observe that part of it floats while part remains submerged.
- Sprinkle coarse salt on the ice cube.
- Watch the colored veins form inside the melting ice cube.
The ice cube then melts faster and reveals colorful strands that flow into the water like little rivers. A mesmerizing spectacle that makes science visual and captivating!
Questions to ask the child:
- Why does part of the ice cube always remain above water?
- Does salt really speed up the melting?
- What would happen if we used sugar instead of salt?
Explanation: Ice is less dense than liquid water, which is why it floats (like icebergs in the ocean). Salt lowers the melting point: upon contact, the ice melts faster, leading to the appearance of the famous colored veins that flow into the water.
Fun variation: Mark the water level with the marker before and after the ice cube melts. You will see that the level remains the same: a simple way to demonstrate that the melting of the ice pack does not raise sea levels!
5 Pepper That Flee (Surface Tension)
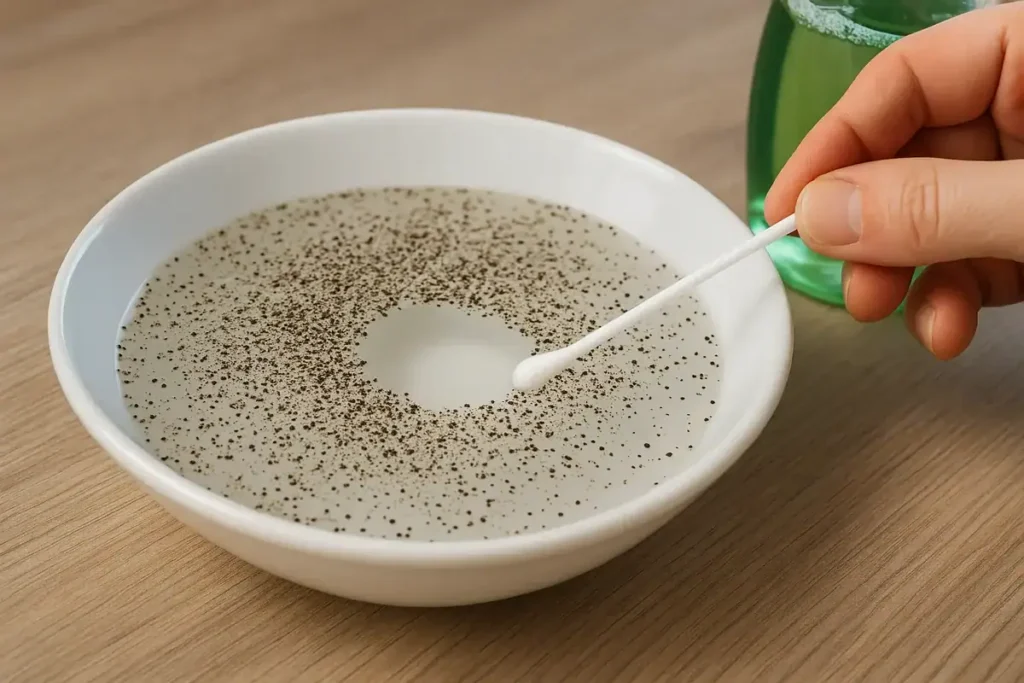
Here’s an ultra-simple and quick experiment that always has a little effect: in just a few seconds, the pepper “flees” from a simple drop of soap! It allows you to visualize an invisible phenomenon: surface tension, the force that keeps water molecules linked together. A little scientific magic to perform in the kitchen.
Necessary materials:
- A shallow plate or a small bowl
- Water
- A little ground pepper
- Dish soap
- A cotton swab
Steps to follow:
- Fill the plate with clear water.
- Generously sprinkle pepper on the surface.
- Dip the end of the cotton swab into the dish soap.
- Gently touch the center of the water with the soapy cotton swab… the pepper immediately moves away!
The result is spectacular: the pepper “flees” toward the edges as if it were afraid of the soap. An effect that always surprises kids and makes them want to try again and again.
Questions to ask the child:
- Why doesn’t the pepper move before adding the soap?
- What would happen if we added a second drop of soap?
- Would the experiment work with something other than pepper (e.g. flour, cinnamon)?
Explanation: The pepper simply floats on the surface of the water, without reacting. But the soap reduces the surface tension: water molecules reorganize, and this movement abruptly pushes the pepper outward.
Fun variation: Try with coarser pepper or fine pepper to see the difference, or compare hot water and cold water to see if the reaction changes speed. You can also test with other powders to vary the effects.
Dinosaur Toothpaste (Giant Foam)
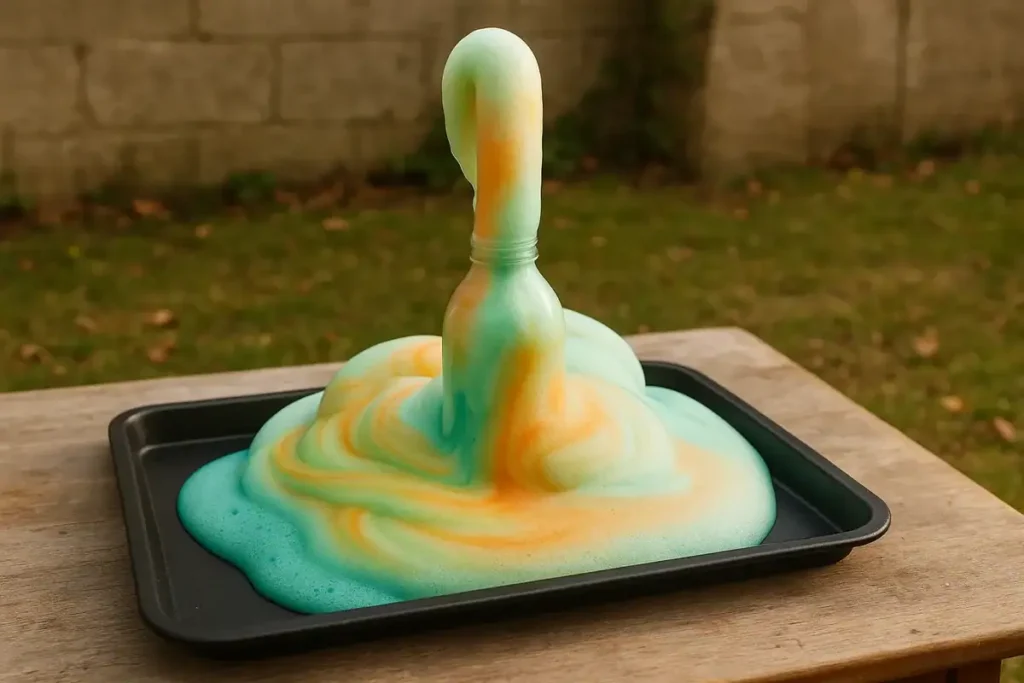
Get ready for a spectacular reaction that always impresses kids: the famous “Dinosaur Toothpaste.” By mixing a few simple ingredients, a huge colorful foam erupts from the bottle, as if a dinosaur just brushed its teeth! A fun experiment to discover the decomposition of hydrogen peroxide.
Necessary materials:
- A plastic bottle (narrow neck preferred)
- 3% hydrogen peroxide
- A packet of yeast
- Warm water
- A bit of dish soap
- Some drops of food coloring
- A tray or bin to catch the overflow
Safety precautions: wear protective glasses if possible, do not touch the foam to your eyes, and always conduct the experiment under the supervision of an adult.
Steps to follow:
- In the bottle, pour in the hydrogen peroxide, a few drops of coloring, and a splash of dish soap.
- In a small bowl, rehydrate the yeast in warm water for 5 minutes.
- Quickly pour the yeast into the bottle… and watch the foam explosion!
In just a few seconds, a giant colored foam fills the bottle and overflows in a cascade. This is one of children’s favorite experiments as it is both fun, visual, and surprising.
Questions to ask the child:
- Why does the foam rise so quickly?
- Is the foam warm or cold to the touch?
- What would happen if we changed the amount of yeast or soap?
Explanation: The yeast contains an enzyme called catalase, which breaks down hydrogen peroxide (H₂O₂) into water (H₂O) and oxygen (O₂). The soap traps the produced oxygen and forms foam bubbles. The reaction is slightly exothermic, which explains the released heat.
Fun variation: Try using bottles of different sizes to compare the effect or use 6% hydrogen peroxide (reserved for adults, with precautions). You can also create a “rainbow toothpaste” by adding multiple colors.
7 Lemon Volcano
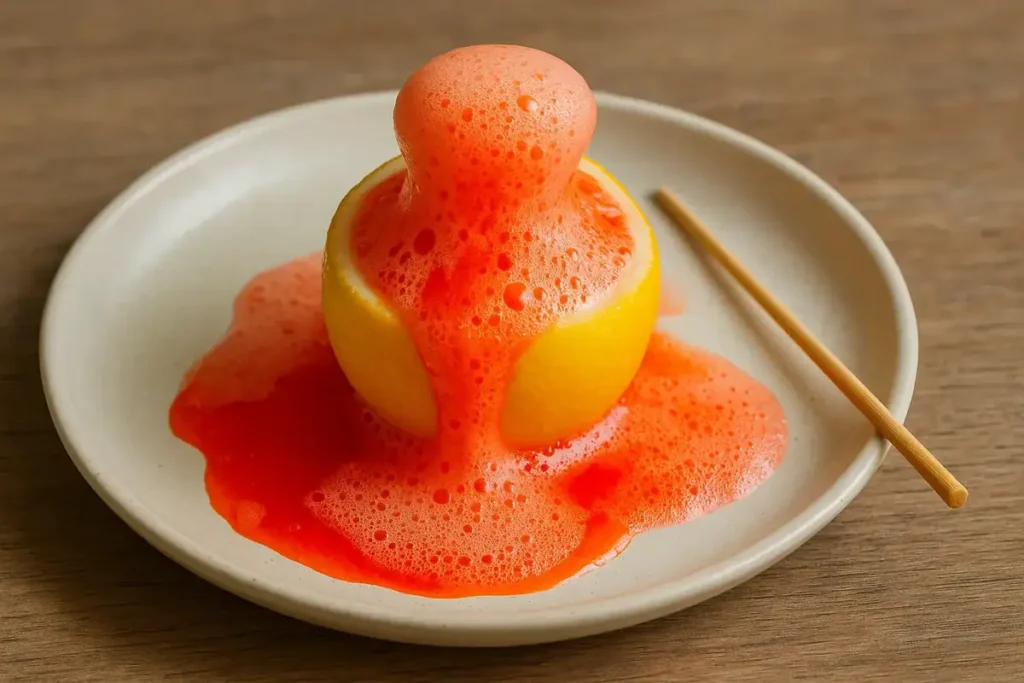
A simple lemon can turn into a mini-erupting volcano! By combining the fruit’s acidic juice with baking soda, an effervescent reaction occurs, projecting colorful foam that mimics real lava flow. This experiment is as simple as it is impressive, perfect for introducing kids to chemistry.
Necessary materials:
- One large lemon (or several for comparison)
- Baking soda
- A few drops of food coloring (red or orange for the “lava” effect)
- A small stick or spoon for mixing
- A tray to catch spills
Steps to follow:
- Lightly cut the top of the lemon or squeeze it to release a little juice.
- Drop a few drops of coloring onto the pulp.
- Add a spoonful of baking soda directly inside the lemon.
- Gently mix with a stick… and watch the foamy eruption!
The reaction is immediate: a sparkling foam bursts forth and overflows like lava from a miniature volcano. A spectacular visual effect that always fascinates children.
Questions to ask the child:
- Why does the lemon react with the baking soda while water alone does not react?
- Does a lime produce as much foam as a yellow lemon?
- What would happen if we used an orange or a grapefruit?
Explanation: the lemon contains citric acid, which reacts with baking soda. This acid-base reaction releases carbon dioxide (CO₂) in the form of bubbles that inflate the mixture and create the effervescent foam.
Fun variant: create a field of volcanoes using different citrus fruits (lemon, orange, grapefruit, lime). Compare the height and speed of the eruptions to see which fruit is the most “explosive.”
8 Dancing Seeds or Raisins
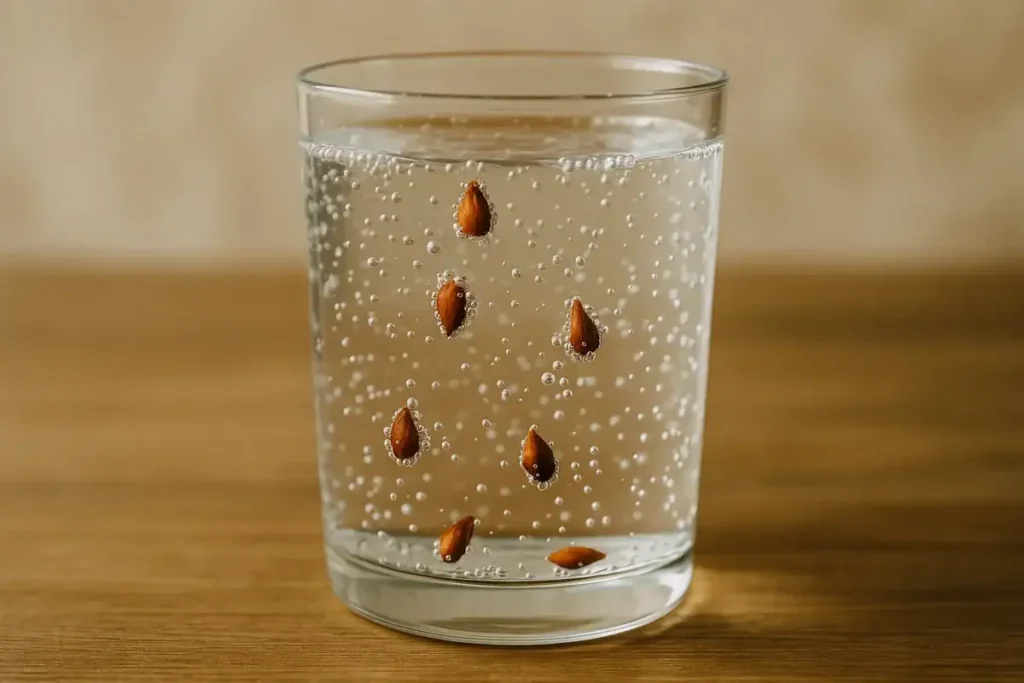
What if a simple glass of sparkling water turned into a dance floor? With this experiment, children observe how carbon dioxide (CO₂) can make lightweight objects like seeds or raisins go up and down. It’s a fun spectacle that perfectly illustrates buoyancy and the role of bubbles.
Necessary materials:
- A clear glass
- Sparkling water (or clear soda)
- A few apple seeds or raisins
Steps to follow:
- Fill the glass with very cold sparkling water.
- Dip 2 or 3 seeds (or raisins) into the liquid.
- Observe: they sink at first, then rise, then fall… and start again!
It looks like the seeds are dancing endlessly to the rhythm of the bubbles. This quick experiment always fascinates with its simplicity and hypnotic visual effect.
Questions to ask the child:
- Why do the seeds stay at the bottom at first?
- How do the bubbles make them rise?
- Why do they fall back down after a while?
Explanation: At the bottom of the glass, CO₂ bubbles stick to the seeds and increase their bounciness. They then become less dense than water and rise to the surface. When the bubbles pop, the seeds become heavy again and fall. The cycle restarts as long as there is gas in the liquid.
Fun variation: Compare different carbonated liquids (sparkling water, lemonade, soda), or test other lightweight objects (corn kernels, lentils, small pieces of dough). Some will “dance” longer than others!
9 Chalk and Vinegar
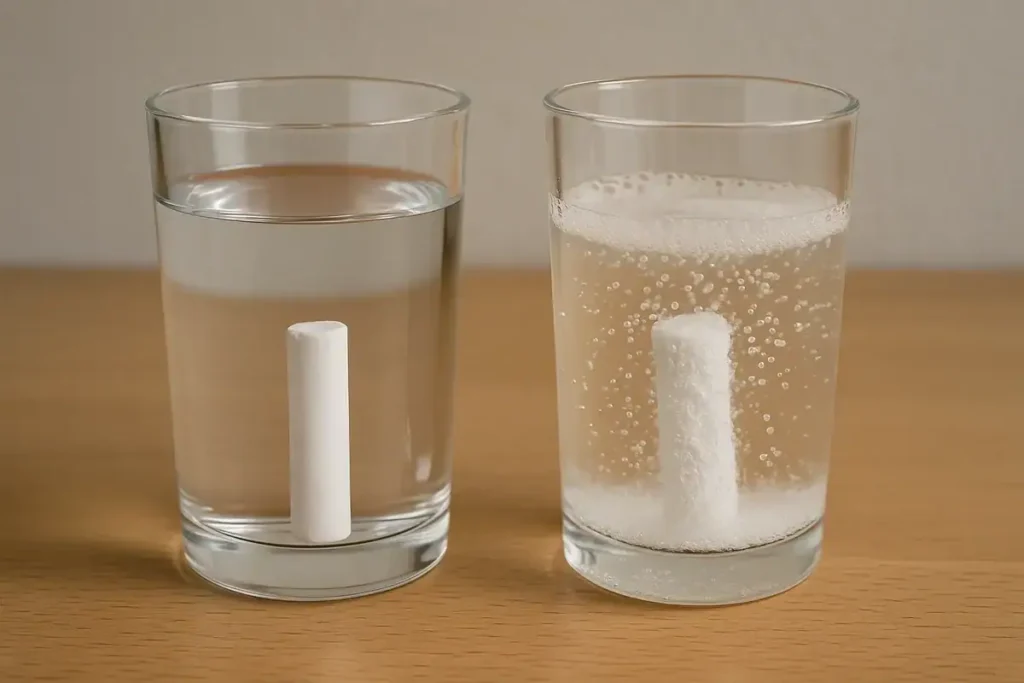
What if a simple piece of chalk could bubble like an effervescent tablet? This experiment allows you to visualize a chemical reaction between a carbonate and a weak acid. In a few minutes, the chalk crumbles, is covered with bubbles, and seems to literally dissolve before our eyes.
Materials needed:
- One or two pieces of chalk (preferably white)
- Two clear cups
- Water (control)
- White vinegar
Steps to follow:
- Fill one cup with clear water and the other with vinegar.
- Immerse a piece of chalk in each cup.
- Observe the difference: the chalk in the water doesn’t move, while the one in the vinegar quickly becomes covered in bubbles.
- After a few minutes, take out the chalk and notice that it has become crumbly.
This is a simple yet visually engaging reaction: vinegar attacks the chalk and produces a visible gas release.
Questions to ask the child:
- Why doesn’t the chalk in the water change while the one in the vinegar bubbles?
- Are the bubbles that appear air or another gas?
- Did the chalk lose weight after the experiment?
Explanation: chalk is made up of calcium carbonate. When it contacts the acetic acid in vinegar, a chemical reaction occurs: the carbonate dissolves and releases carbon dioxide (CO₂) in the form of bubbles. This is the same phenomenon that occurs when shells or limestone are attacked by an acid.
Fun variation: if you have a small scale, weigh the chalk before and after the experiment to observe the loss of mass. You can also compare cold vinegar and warm vinegar to see if the reaction is faster.
10 Sugar Crystals (Candy Sugar)
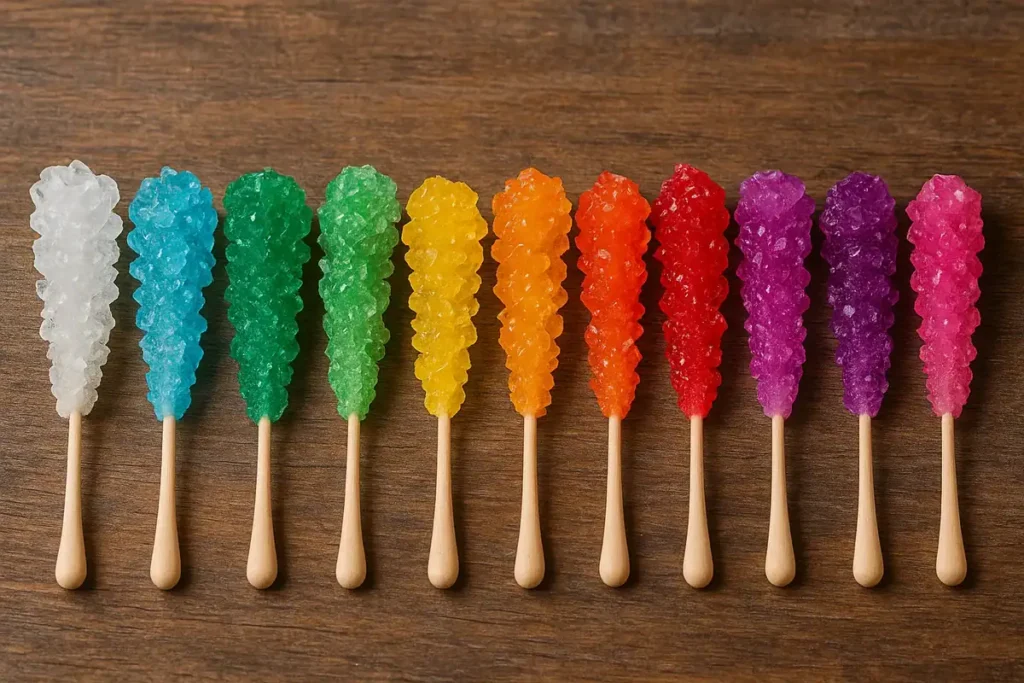
Nothing beats an experiment that is both scientific and delicious! By making sugar crystals, children learn about the principle of a saturated solution and the magic of slow crystallization. With a little patience, the result is spectacular: beautiful shiny crystals form on a stick, like sweet jewels.
Materials needed:
- Water
- Lots of sugar (white or brown)
- A saucepan
- A glass jar
- A wooden stick (or a skewer)
- A clothespin to suspend the stick
- Food coloring (optional, for a more aesthetic effect)
Safety precaution: hot syrup should only be handled by an adult to prevent burns.
Steps to follow:
- Heat water in a saucepan.
- Add sugar gradually while stirring until the water no longer dissolves it (saturated solution).
- Pour the syrup into the glass jar.
- Dip the stick into the syrup, then suspend it in the center of the jar using the clothespin.
- Let it rest for several days without moving the jar, and watch the crystals gradually form.
After a few days, the stick is covered in sparkling crystals. It’s an experiment that teaches patience, but the reward is both beautiful and delicious!
Questions to ask the child:
- Why do we need to put so much sugar in the hot water?
- What would happen if we tried with cold water?
- Does the size of the crystals change if the room is hot or cold?
Explanation: when the water is hot, it can dissolve much more sugar. As it cools down, the excess sugar can no longer stay in solution: it precipitates and organizes into crystals on the support (in this case, the stick). This is exactly the same principle as the formation of salt or rock crystals in nature.
Fun variation: compare white sugar and brown sugar to see if the crystals are different, or sprinkle the stick with sugar before dipping it: these small particles will serve as “seeds” and speed up the growth of the crystals.
11 Floating Egg (Salt Water)
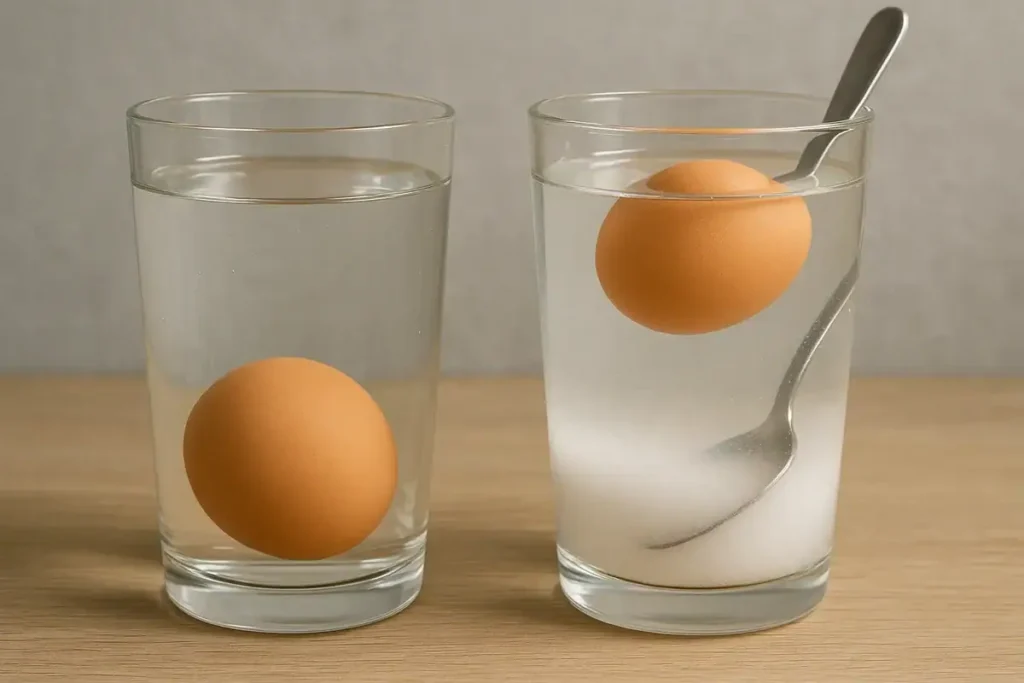
A simple egg can become the hero of a scientific demonstration! This experiment highlights Archimedes’ buoyancy and the difference in density between fresh water and salt water. Result: in one glass the egg sinks, in the other it magically floats. A simple and visual way to understand why you float more easily in the Dead Sea than in a pool.
Necessary materials:
- 2 transparent glasses
- Tap water
- A lot of salt (about 6 to 10 tablespoons)
- 2 raw eggs
- A spoon for mixing
Steps to follow:
- Fill both glasses with water.
- In the first glass, add nothing: drop the egg in, it sinks to the bottom.
- In the second, dissolve several tablespoons of salt in the water.
- Drop the other egg: this time, it floats on the surface!
The difference is striking: by adding salt, the water becomes denser than the egg, causing it to rise automatically. A simple and effective demonstration.
Questions to ask the child:
- Why does the egg sink in fresh water but float in salt water?
- How many tablespoons of salt need to be added for the egg to rise?
- What would happen if you gently mixed salt water and fresh water in the same glass?
Explanation: the more salt the water contains, the more its density increases. When the density of the water exceeds that of the egg, Archimedes’ buoyancy overcomes the weight, and the egg floats. This is the same principle that explains buoyancy in certain very salty seas.
Fun variation: try to create a salt gradient by gently pouring fresh water over salt water. If you carefully place the egg, it will remain suspended in the middle of the glass, as if in zero gravity!
12 Homemade Compass
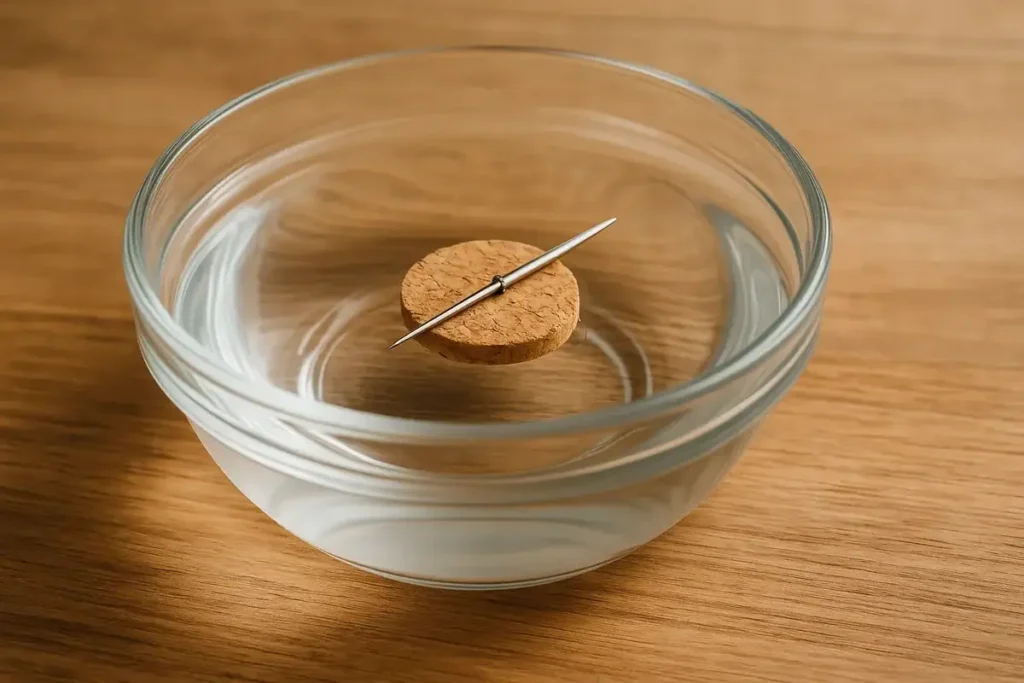
Who would have thought that with a simple needle and a piece of cork, you could make a real compass? This experiment allows children to discover magnetism and understand how a needle can always point north. A simple DIY project that takes you right to the heart of exploration!
Materials needed:
- A fine needle
- A small magnet (or the back of a fridge magnet)
- A piece of cork (or polystyrene)
- A bowl of water
Safety precaution: handle the needle carefully and under adult supervision.
Steps to follow:
- Take the needle and rub it multiple times in the same direction against the magnet.
- Insert the needle horizontally into the piece of cork.
- Gently place the cork on the water in the bowl.
- Observe: the needle aligns itself in the North-South direction.
The surprise is always there: without a battery or electronics, the needle transforms into a navigation tool! It’s a great way to show that the Earth has its own magnetic field.
Questions to ask the child:
- Why do you need to rub the needle in the same direction and not back and forth?
- How many rubs does it take for the needle to become magnetic?
- How did explorers navigate before the invention of GPS?
Explanation: By rubbing the needle with a magnet, you align the tiny magnetic domains in the metal: the needle then becomes a small magnet. Floating freely on the water, it naturally aligns itself with the Earth’s magnetic field, indicating North and South.
Fun variation: test the compass near metal objects (scissors, paper clips) or another magnet: you’ll see that the needle gets disrupted and changes direction. A playful way to show that magnetism can be influenced by the environment.
13 Homemade Lava Lamp
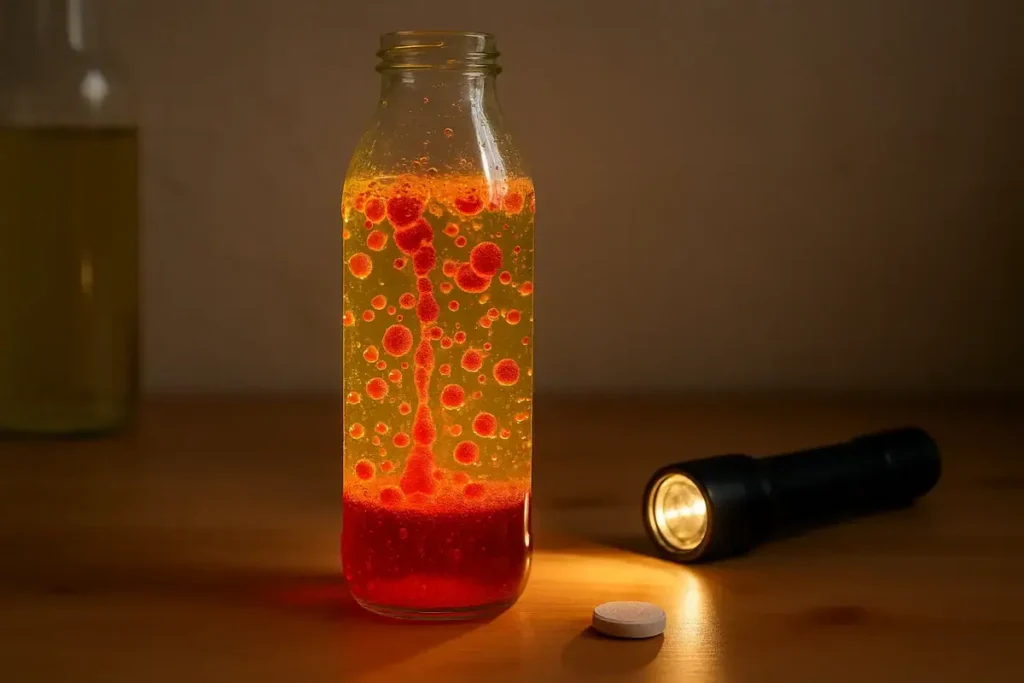
What if you could create a real lava lamp with everyday ingredients? This spectacular experiment allows you to observe two phenomena at once: the immiscibility of water and oil, and the gas release caused by an effervescent tablet. The result is mesmerizing: colorful bubbles rise and fall like in a decorative lamp.
Necessary Materials:
- A clear bottle (or a large glass)
- Vegetable oil
- Water mixed with food coloring
- An effervescent tablet (like vitamin C)
- A flashlight (optional for visual effect)
Steps to Follow:
- Fill the bottle with about 2/3 oil and 1/3 colored water.
- Wait a few seconds for the two liquids to separate.
- Place a piece of the effervescent tablet in the bottle.
- Observe: colorful bubbles form, rise, burst at the surface, then fall back down.
In just a few moments, the mixture transforms into a mini homemade lava lamp. A magical effect that captivates children and makes science fun and visual!
Questions to Ask the Child:
- Why do water and oil never mix?
- Does the size of the tablet pieces change the speed of the bubbles?
- What would happen if we shook the bottle before adding the tablet?
Explanation: oil and water do not mix because they are immiscible. When the effervescent tablet reacts in the water, it releases CO₂ that carries the colored droplets upward. Once the gas escapes to the surface, the droplets fall back down as they become denser than the oil.
Fun Variant: place a lamp under the bottle or in a dark room to enhance the visual effect. You can also try several different colorings to create a multicolored “lava.”
14 Invisible Lemon Juice Ink
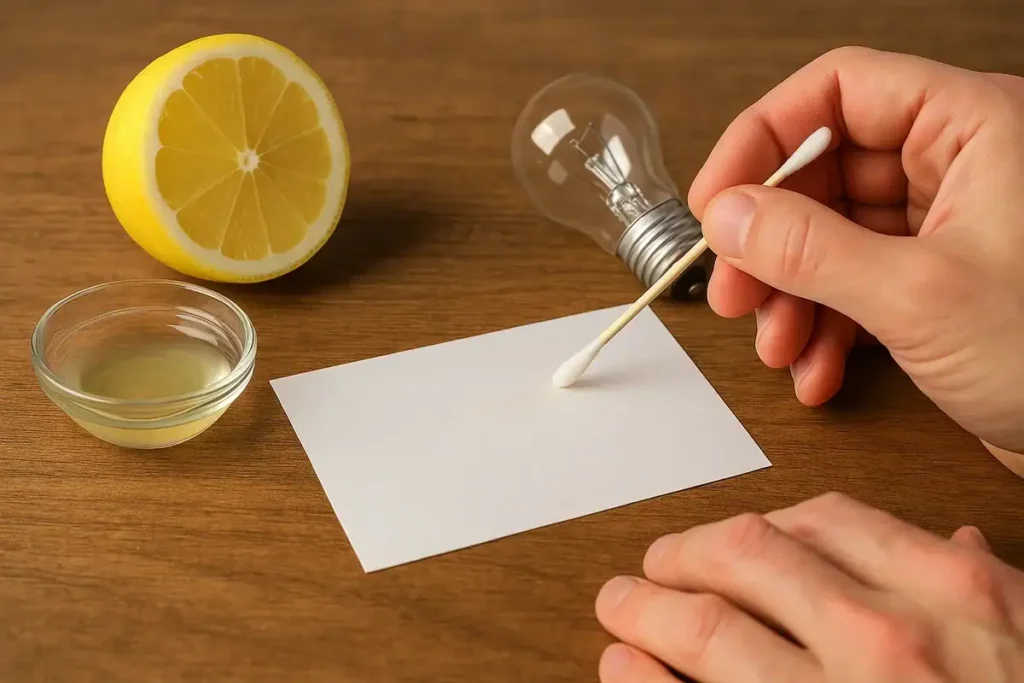
Who has never dreamed of writing a secret message like a real spy 🕵️♂️? With a little lemon juice, it’s possible to create invisible ink that only reveals itself with heat. A simple, fun, and mysterious activity that appeals to both children and curious adults.
Materials needed:
- A bit of fresh lemon juice
- A cotton swab or a fine brush
- A sheet of white paper
- A gentle source of heat (warm iron, hair dryer, or incandescent bulb)
Safety precaution: the use of heat should be only under adult supervision, and always at a moderate intensity to avoid burning the paper.
Steps to follow:
- Dip the cotton swab into the lemon juice.
- Write or draw a secret message on the white sheet.
- Allow to dry completely: the writing becomes invisible.
- Gently heat the sheet… the message appears in brown!
The revelation is magical: a text or invisible drawing becomes legible when heated. A perfect experiment to understand chemistry while having fun.
Questions to ask the child:
- Why isn’t the message visible before heating?
- What would happen if we used vinegar or milk instead of lemon?
- Would the message remain visible after cooling down?
Explanation: lemon juice contains acids and sugars that brown faster than paper when exposed to heat (oxidation and initial caramelization). It’s this difference in reaction that makes the invisible letters appear.
Fun variation: test different liquids (vinegar, milk, onion) to compare the results, or use various heat sources to see which one reveals the message the fastest.
15 Balloon Rocket (Action-Reaction)
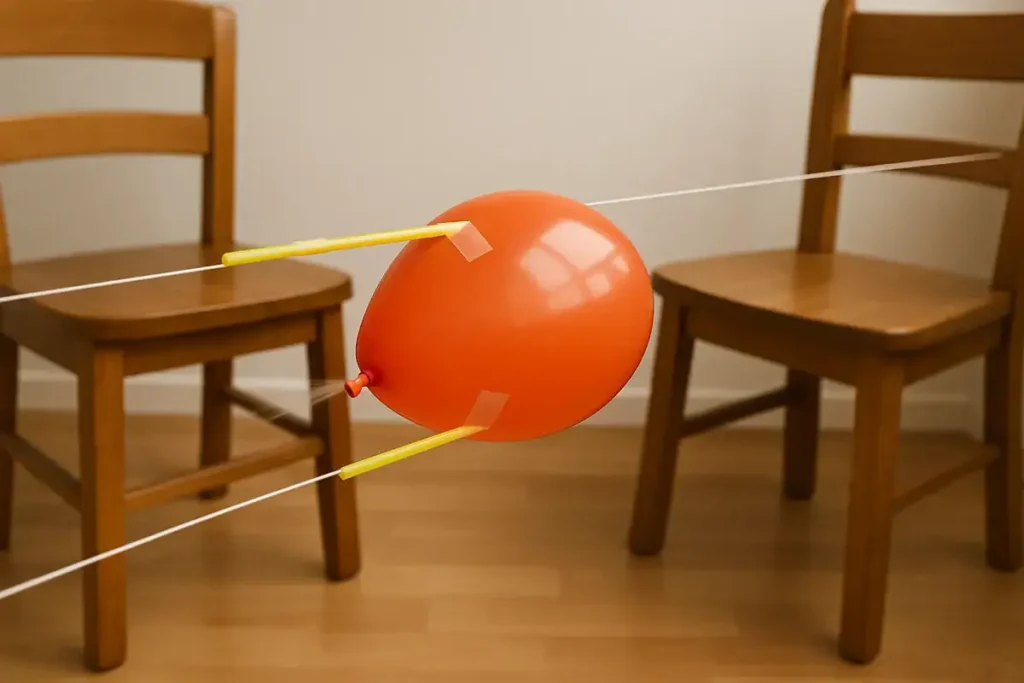
Ready for takeoff? 🎈 This simple experiment turns a balloon into a real mini rocket. It perfectly illustrates Newton’s third law: for every action, there is an equal and opposite reaction. The expelled air propels the rocket along a string, creating a spectacular effect at home or in the classroom.
Materials Needed:
- A latex balloon
- A long piece of string (6 to 10 feet)
- A straw
- Some tape
- Two chairs or supports to stretch the string
Steps to Follow:
- Stretch the string taut between two chairs or two stable supports.
- Slide the straw onto the string: this will act as the “rail.”
- Tape an uninflated balloon to the straw, with the opening facing backward.
- Inflate the balloon without tying it, hold the opening, then release… the rocket shoots off at full speed!
The balloon turns into a mini propellant, moving forward thanks to the simple push of the air. A guaranteed takeoff that amazes both young and old!
Questions to Ask the Child:
- Why does the rocket move forward when the air escapes from the balloon?
- What would happen if the string were angled?
- Will a bigger balloon go faster or farther than a smaller balloon?
Explanation: As the air exits, it is expelled backward. In reaction, the balloon is propelled forward: this is the principle of Newton’s third law, the same principle that propels rockets in space.
Fun Variation: Compare balloons of different sizes, angle the string or stretch two in parallel to organize a rocket race. Success guaranteed!
16 Coffee Filter Parachute
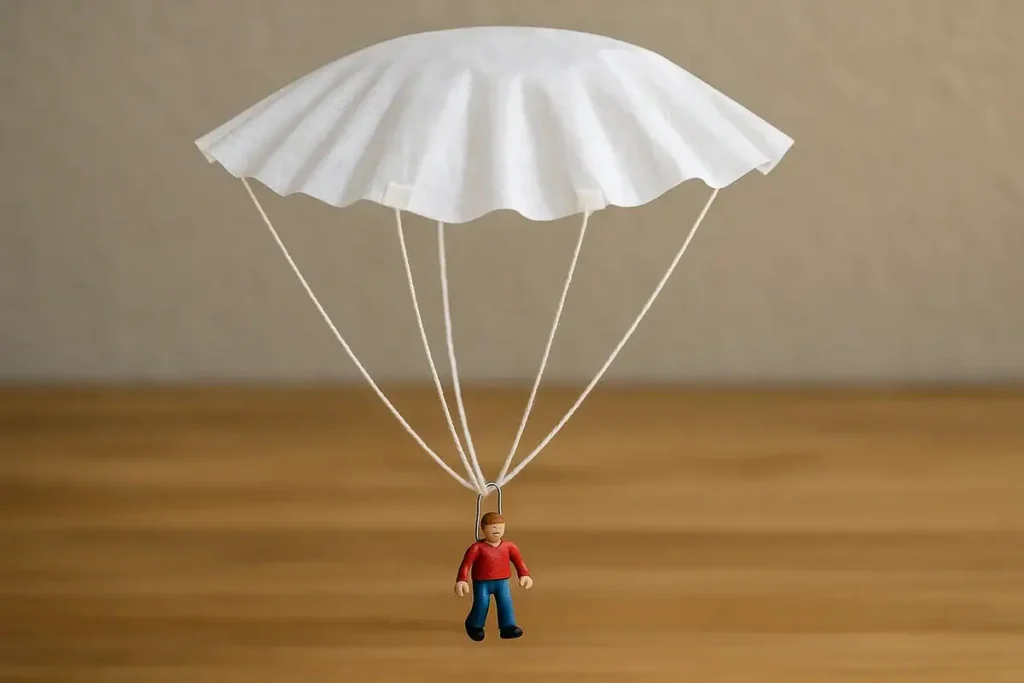
What if a simple sheet of paper could save a figurine from free fall? With this easy DIY project, we create a mini-parachute that shows how air resistance can slow down a fall. It’s a fun experiment that combines science and creativity, helping to understand why parachutists descend so slowly.
Necessary materials:
- A coffee filter (flat round or cone-shaped)
- 4 pieces of string of equal length
- A paper clip, a small figurine, or a lightweight object
- Some tape
Steps to follow:
- Attach the 4 strings around the coffee filter at regular intervals.
- Connect the ends of the strings to the paper clip or small figurine.
- Climb onto a chair and drop the parachute from a height.
- Observe: the figurine descends slowly due to air resistance.
The coffee filter acts as a canopy: by increasing the exposed surface area, it slows the fall and allows the figurine to land gently. It’s a simple way to understand the magic of aerodynamics.
Questions to ask the child:
- Why does the parachute descend more slowly than an object without strings?
- Would a larger coffee filter slow the fall even more?
- What would happen if we poked holes in the filter?
Explanation: The larger the surface area of the parachute, the greater the drag force opposing gravity. This is known as drag. The parachute slows the fall speed and cushions the landing.
Fun variant: Try different materials: plastic bag, newspaper, lightweight fabric… Compare which one slows the fall the best. You could even organize a homemade parachute competition to see which one glides the longest.
17 Germinating Bean (Cotton Jar)
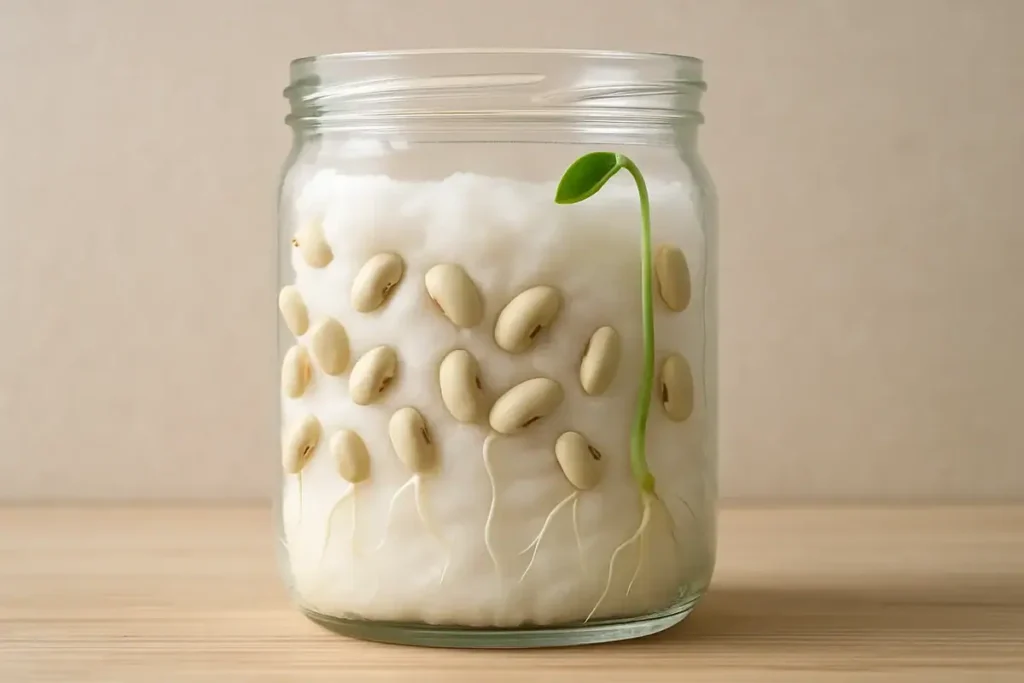
There’s nothing more fascinating than seeing life appear before your eyes! With this experiment, children follow step by step the germination of a seed. In just a few days, the bean awakens, develops a root, and then a little stem that reaches for the light. It’s a simple activity that teaches patience and illustrates the plant life cycle.
Materials Needed:
- A clear glass jar
- Cotton or paper towel
- Some bean seeds
- A little water
Steps to Follow:
- Lightly moisten the cotton and place it at the bottom and along the walls of the jar.
- Wedge 2 or 3 bean seeds between the cotton and the jar wall so you can see them clearly.
- Add a little water if necessary, without drowning the seeds.
- Observe each day: a root appears, then a stem growing upward.
The spectacle is magical: in just a few days, you can clearly see the root digging down and the stem reaching for the light. It’s a perfect experiment to introduce children to biology and living observation.
Questions to Ask the Child:
- Does the seed need light right from the start of germination?
- Why does the root grow downward and the stem upward?
- What would happen if we added too much water?
Explanation: initially, the seed survives on its internal reserves. A root emerges to absorb water, and then a stem develops. Once the first leaves appear, the plant begins to produce its own energy through photosynthesis.
Fun Variation: Compare two jars: one placed in the light, the other in the dark, or one jar in a warm place and another in a cool spot. You will see differences in speed and growth.
18 Jar Rain (Saturated Cloud)
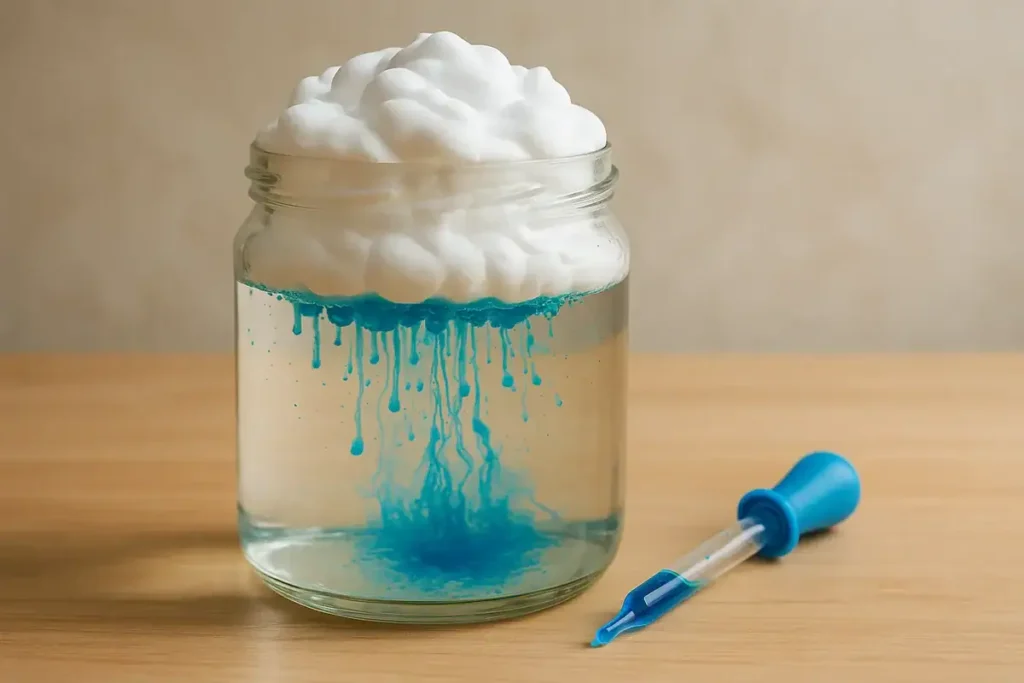
What if we could recreate a miniature storm in our kitchen? With this simple experiment, children understand how precipitation forms. A jar of hot water represents the atmosphere, shaving foam mimics a cloud, and the colored drops become the rain. The result is visual, poetic, and very illustrative!
Materials needed:
- A glass jar filled with hot water
- Shaving foam (to simulate the cloud)
- Colored cold water (with food coloring)
- A dropper or pipette
Steps to follow:
- Fill the jar three-quarters full with hot water.
- Cover the surface with a thick layer of shaving foam.
- Using a dropper, slowly add colored water on the shaving foam.
- Observe: when the foam is “saturated,” colored streams fall like rain.
The spectacle is fascinating: little by little, the artificial cloud fills with water, then releases a genuine miniature shower. A fun and visual way to explain the water cycle.
Questions to ask the child:
- Why doesn’t the rain fall from the first drops?
- What happens if we add much more coloring at once?
- Does the rain fall faster if the water in the jar is very hot?
Explanation: in the atmosphere, a cloud is made up of tiny suspended droplets. When it becomes too saturated with water, the droplets clump together and grow larger. Under the effect of gravity, they fall: this is the rain. The shaving foam plays the role of the cloud here, and the coloring simulates the accumulating water.
Fun variation: measure the time it takes for the first drops to fall with hot, warm, or cold water. You’ll see that the temperature influences the speed of the phenomenon.
19 Marker Chromatography
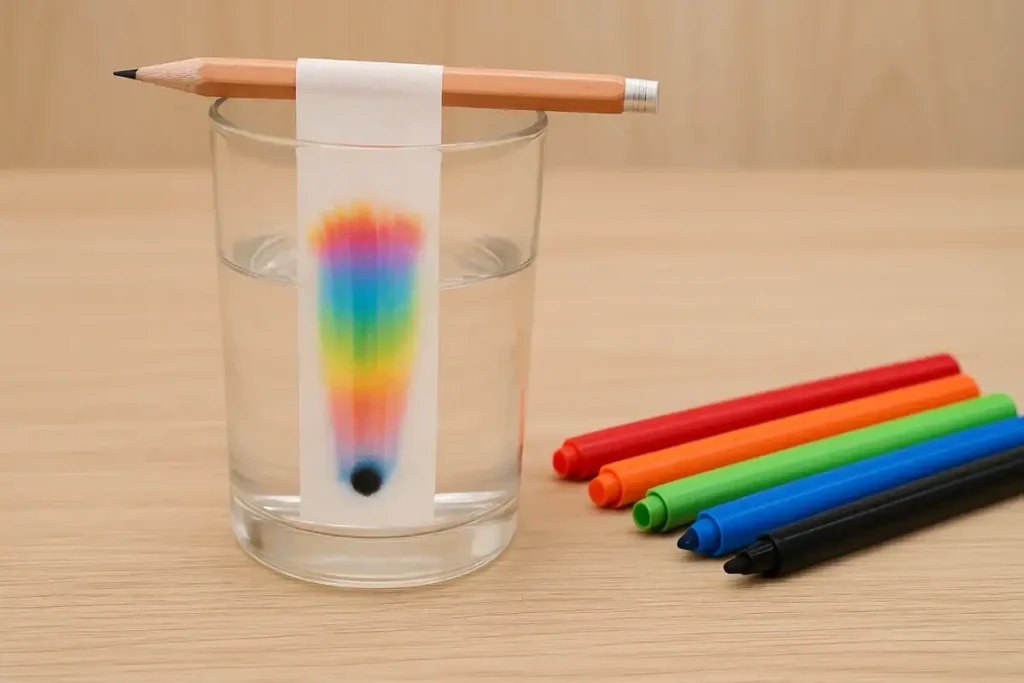
A black marker is not always… black! Through this experiment, children discover that inks are actually composed of multiple pigments. The technique of chromatography allows these hidden colors to be separated, revealing a true rainbow on a simple coffee filter.
Materials needed:
- A coffee filter or blotting paper
- Water-based markers (black and colored)
- A glass with a small amount of water
- A pencil and tape
Steps to follow:
- Cut a strip from the coffee filter.
- Draw a dot with the marker about 0.5 Inch from the bottom of the strip.
- Attach the strip to a pencil laid across the glass, so that the lower end dips into the water without the dot being submerged.
- Observe: as the water rises, the pigments separate and form bands of color.
The result is often surprising: a black marker can reveal blue, green, purple, or even red. It is a simple yet very visual experiment that illustrates the composition of inks.
Questions to ask the child:
- Why does the water rise up the paper?
- Do all black markers give the same hidden colors?
- What would happen if we used another type of solvent, like alcohol?
Explanation: The water rises by capillarity in the paper and carries the pigments with it. Since they do not have the same solubility or affinity with the fibers, they move at different speeds and eventually separate. This principle is used in laboratories to analyze chemical mixtures.
Fun variation: compare washable markers and permanent markers. For alcohol-based inks, use a bit of alcohol instead of water (always under adult supervision) and observe the difference.
20 Balloon that Inflates by Itself
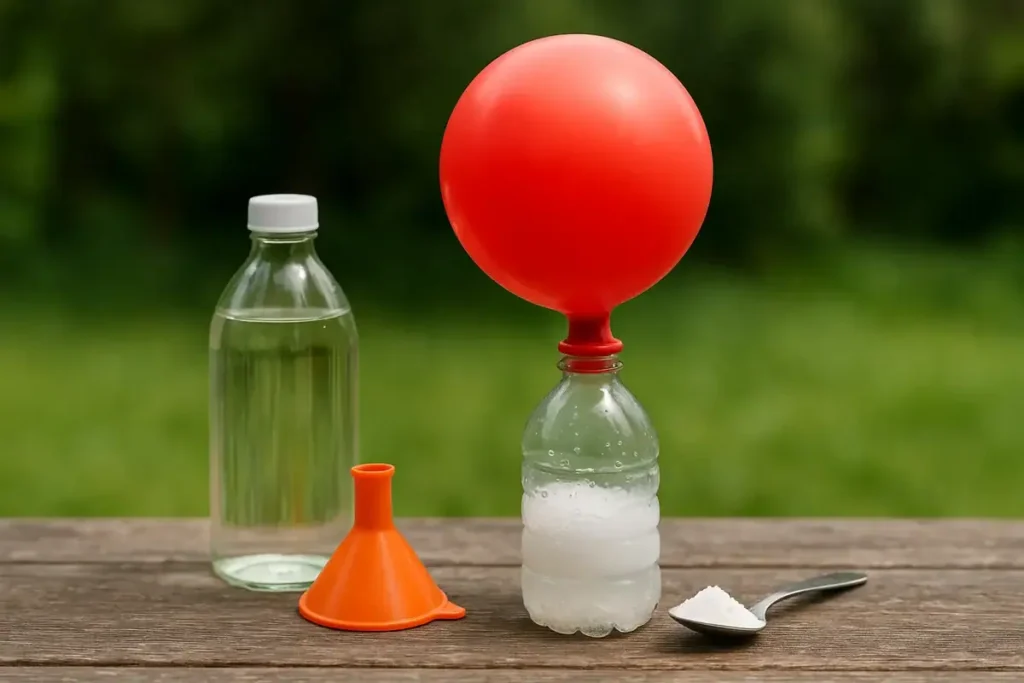
A balloon that inflates without blowing into it? It’s possible thanks to a fun chemical reaction that produces carbon dioxide (CO₂). By mixing vinegar and baking soda, we release a gas that fills the balloon like magic. A simple, visual, and always impressive experiment.
Required materials:
- A small plastic bottle
- A balloon
- White vinegar
- Baking soda
- A funnel or a small spoon
Safety precautions: never place the inflated balloon near your mouth and avoid shaking the bottle too hard to prevent the balloon from bursting.
Steps to follow:
- Pour a little white vinegar into the bottle.
- Using the funnel, fill the balloon with 1 or 2 spoons of baking soda.
- Attach the neck of the balloon to the mouth of the bottle, without yet pouring the powder.
- Gently lift the balloon so that the baking soda falls into the vinegar.
- Observe: the balloon inflates by itself from the gas produced!
The effect is magical: within seconds, the balloon expands by itself, as if an invisible hand is inflating it. A guaranteed “wow” moment for kids.
Questions to ask the child:
- Why does the balloon inflate without us blowing into it?
- Does adding more baking soda make the balloon inflate more?
- What would happen if we used lemon juice instead of vinegar?
Explanation: The acid-base reaction between vinegar (acetic acid) and baking soda produces carbon dioxide (CO₂). This gas takes up space and exerts pressure that inflates the balloon.
Fun variation: Measure the circumference of the balloon with a tape to compare different recipes: vinegar vs. lemon juice, small vs. large amounts of baking soda… and find the most effective combination! A great way to introduce the scientific method to kids.
If you’re looking for more hands-on experiments, check out these science toys to keep the fun going!